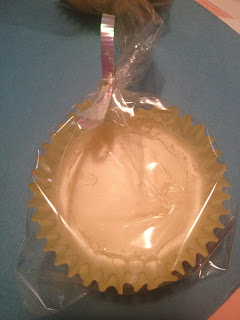
Mind out of the gutter folks.
Popping up across the country, in various farmer's markets and private groups, it's the idea of trading home goods ...could be eggs for pickles, or brandied cherries for homemade soap. I read about the idea on the Hip Girl's Guide To Homemaking, by Kate Payne. I thought the idea was a keeper, and did some hunting around, and found a local one. A great place to look is The Food Swapper Network.
In either case, I'd made a swap this fall, (the canned pears? or maybe rosehip lemongrass jelly...but I digress) for a lotion bar. It was a last minute swap, and I thought what the heck.
One of the best swaps I made all summer. It was tangerine patchouli, which while I know its popular, is not one of my favorite scents. It worked amazingly well on those really hard callussed and constantly cracking places, like heels. But sadly, i'ts nearly gone.
Since I couldn't get an answer from the group as to who made it, or the recipe, I did some hunting around and researching.
I already knew that the scent I wanted was cedar lemongrass. (It's one I use in massage oils, very nice.) The recipe is as follows:
1/2 c. (2 oz.) shea butter (this is the raw stuff, not shea butter lotion-had to order online)
2.5 oz (by wieght on this one) of shredded beeswax OR
2/3 c. beeswax pastelles
1 tsp. vitamin E oil (This is to increase shelf life.)
 essential oils for fragran.
I added the frangrance oils by smell, but it was a BAD idea. When it is in liquid form, some smells just hide, and come back out when they are cool. Like soapmaking, some smells don't translate as well in the lotion bars. Because I did it by smell, I ended up having to remelt them, and adding more cedar oil. In addition, remember that some oils are more harsh for senstive skin. I also found that citrus oils (lemon, lime, orange, etc) should not be added if you plan on wearing in the sun.
You will need to put your ingredients (except the essential oils--heat can ruin some) in a pan. This is where I disagree with other recipes. Most say you want to melt these over a double boiler, or in a water bath. However, the same recipes state that introduction of water can ruin your bars! so I don't want water near it. Hence, I take the very low, very slow, and watch like a hawk approach.on low it took about 10 minutes to melt entirely.
While it was melting, (The picture is about halfway through the process) I took out my 6 cup cupcake pan and put in paper cupcake liners.
When it is ready, the oil will be completely clear, and look as though you just poured canola oil in the pot. After it is all melted, add the essential oils.

This recipe will make 6 cupcake sized lotion bars, but if you have silicone molds, go for it, they'd work just as well.
After filling, I made sure to use all I couldn't scrape out of the pot on myself. It doesn't need to cure or anything, and I hate waste.
Ten minutes into the cooling process. My house stays rather cool, and they won't truly harden well for about 24 hours. But after about a half hour, they are solid enough to move around. Your body heat will cause them to soften, so they need to be stored in a relatively cool place. I also package these, for that exact reason.
Price Breakdown, main ingredients cost me about $25. But with that, I have enough to make at LEAST 4 batches (I suspect 6.)which breaks down to somewhere between $1.04 and .69. This price would vary wildly, depending on the essential oils I choose to use.That being said, the beeswax and shea are both very pleasing, and you might choose not to add any frangrance at all!
(Main recipe came from Everyday Paleo which you can see here. They have some other great ideas!)


I made a second batch with no scent in it at all, and have to admit, I think I like it even more.
ReplyDelete